


Dimplex Control
Control and monitor your heating remotely. Simply connect your Dimplex products to the Dimplex Hub via Wi-Fi or Ethernet and control them anytime, anywhere. You can also find information to help set up your hub here.

Control and monitor your heating and hot water with Dimplex Control. Group heaters into zones to easily control and track their energy usage. Any time. Anywhere.
Spot faults and manage multiple sites, remotely, all from one App. Forgot to turn the heating off before going on holiday? Want to make sure a minimum temperature is maintained? Now your heating is never out of reach.

These are just a few of the features of Dimplex Control app
Dimplex Control App
Easy set-up with a step-by-step wizard. Simple connect your product* to a Dimplex Hub and gain control through the app.
Zoned control for quick views and changes to your heating modes.
Remote access Monitor and control your heating from anywhere in the world using the Dimplex Control app** and a mobile data connection.
Utilise Bluetooth to communicate directly with the Hub. This makes setup quick and never requires you to leave the app during setup**
Monitoring of energy usage
Dimplex control app is available to download at:

![]()
* Only specific heater models and series letters listed above are supported. Dimplex Control support requires additional hardware. In all cases, the purchase of a Dimplex Hub (the model name ‘Dimplex Hub’) is required to connect to the internet and communicate with supported Dimplex products. Some products also require additional hardware to provide RF connectivity (the model name ‘RFM’) for communication with Dimplex Hub. To check if a product requires an RF upgrade, check the compatibility list. Dimplex Control support is subject to change. ** app control requires download and usage of the Dimplex Control app onto a compatible device. Dimplex Control requires the creation of a Dimplex Control account and is subject to agreement of the GDHV Internet of Things (IoT) Terms and Conditions, Privacy Policy and Cookie Policy. *** Dimplex Control initial set-up, updates, and all usage require a broadband internet connection for both system and app; ISP and mobile carrier fees apply.
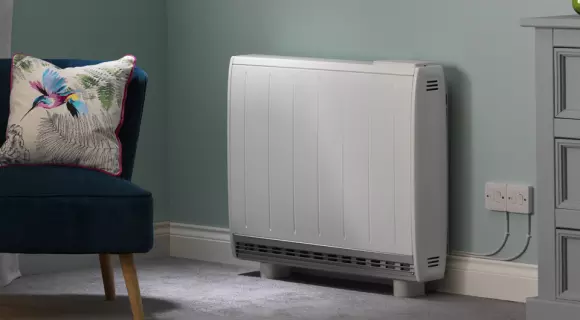
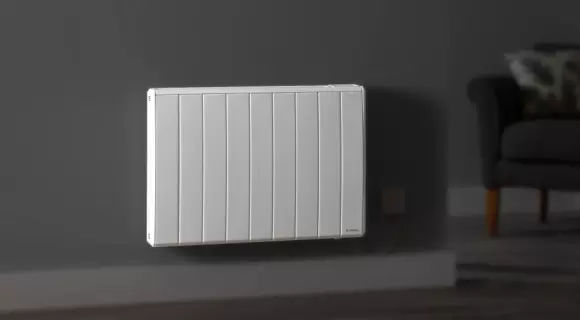
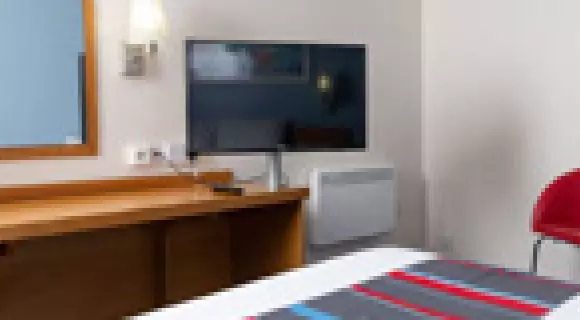
Featured Supported Products


Dimplex Control works with a range of our products
view full listWhat Else Will I Need?
The Dimplex Hub is always required, depending on your heater you may also require the Dimplex RFM.
find out more

FAQ
Yes, however first, check your product is compatible here: https://www.dimplex.co.uk/dimplexcontrol/compatibility
If compatible, check you have an RFM installed into your product and that the product is linked via the Dimplex Hub. It may be that you need to purchase additional hardware such as the RFM in order to enable connectivity.
If you have all the above, download the Dimplex Control app via Google Play Store or the app Store.
Set up an account on the app, and add the product using the GDID code. This can be done by scanning the QR code or manually, by entering the code into app using the code on the product.
(see diagram below of where a GDID is located and what the QR code looks like)

The button labelled with the Hub symbol on the back of the Hub is the Hub factory reset button. When pressed, all information stored on the Hub will be lost. The hub only stores network connection settings and basic account information.
image ?
The button labelled with the cloud symbol is an account reset function. Pressing this while the Hub is connected to the cloud server will send an account delete request for the account that the Hub is currently associated with, then perform a Hub factory reset. This allows the Hub to be re-used and associated with a new account if the original owner’s account details are lost.

No lights indicate there is no power to the device. Check that the device’s AC-DC power adapter is connected to the Hub fully and plugged in to the wall and powered on. If you still have no power LED, try another plugged device with the same plug socket. If there is power to the other device, check the fuse on the AC-DC power adapter for the Hub and replace if needed. If the fuse is ok, your AC-DC power adapter may be faulty; contact Dimplex customer support for further assistance.
Green represents no power issues are Hub faults.
Amber represents battery charging. This is normal and should turn green after a few hours when the battery is fully charged. If your LED continues to be amber, turn off the Hub remove the rear cover and check the battery. Your battery should be warm but not too hot to touch. Your battery should also not be bent or swollen. If your battery is bent/damaged/swollen, take the battery out of the Hub and call Dimplex customer support. You can replace the rear cover of the Hub without the battery installed, power it back on and continue to use Dimplex Hub without the battery until it is replaced.
Red represents either a power or general Hub fault. For example, if your Hub becomes disconnected the power LED may also turn red. Try re-booting the Hub by turning power off, waiting 5 seconds, powering back on and waiting for your Hub to re-connect to the internet. If you see the ethernet or Wi-Fi LEDs turning blue after power-on then turning off, there may be a network connectivity issue causing the fault. A missing battery can also cause a red power LED.
If you are unable to send a command to your Hub, check for internet connectivity on the network that your Hub is connected to using another device. If you can load a webpage, but your Hub is still unreachable, try turning your Hub off and on again and letting it re-connect (the LEDs on the front of your Hub should be green for power, green for either Wi-Fi or ethernet). If you still cannot send commands to your products via the Dimplex Control app, your Hub is showing with a red icon in the Hub list, or the LEDs on the front of the Hub are red, check your Hub’s network settings. Changing network connection can be achieved by selecting the ‘…’ button next to your Hub on the Hub list screen and selecting ‘change network connection’ on the Hub settings screen). If problems persist, contact Dimplex customer support.
Sleep mode if turned on, disconnects any commands from being received or transmitted by your Hub. If you turn this mode off, commands will continue to be received from device to the Dimplex Hub.

Dimplex Hub supports Wi-Fi b/g/n or Wi-Fi 1/3/4, with WEP WPA or WPA2 security.
If you continue to have trouble, try connecting your Hub via ethernet with the included ethernet cable and leaving it for 24 hours. There may be a software update available for your Hub that could improve stability/connectivity. After 24 hours, retry the Wi-Fi setup.
Bluetooth version 4.0 aka Bluetooth low energy (BLE) is used for the first-time setup process when installing Dimplex Hub. This allows the Dimplex Control app to connect directly to the Hub to exchange network configuration and account information without requiring the user to leave the app.
Yes, the Dimplex Control is built on the Microsoft Azure Cloud platform. This provides a highly secure, scalable and intelligent platform for our connected solutions.
Check the RFM is installed correctly by going to the settings menu for your product. Check your product’s manual for instruction of how to do this. If RFM is enabled in the settings menu, check your heater’s ‘info’ screen if available (refer to product’s manual). If RFM is enabled and does not show in the product’s info screen or isn’t connectable via the Dimplex Control app, remove the RFM, check that the connectors are clean and re-insert it. If this didn’t resolve the issue, check the RFM has a label that says RFM. If it doesn’t it might be the blank that the heater came with – looks a lot like the RFM. Power back up after re-inserting and try to enable again. Try adding the appliance to the app again. Ensure the appliance is within RF range of the Hub by moving the Hub closer if need be. If none of this has worked, contact Dimplex customer service for further assistance.
Yes, schedules can be viewed and modified at appliance view from the settings menu on your Dimplex Control app
Yes, you can copy schedule within the User timer edit screen in the Dimplex Control app. Enter the time and temperature you would like to copy, select ‘copy schedule to’ at the bottom of your app, and select to ‘copy a daily plan’ to the days of the week you’d like to copy and paste this schedule to.


